Robotic Weld Weave: Smoother And More Uniform Welds
Robotic weld weaving can help you fill wider joints, control heat input, and improve weld aesthetics. With the right welding robot, weaving is easy to deploy, helping you boost weld quality where appropriate.
| Table of Contents |
Robotic Weld Weave Types
Welding robots can be programmed to follow many different weave patterns. However, most applications don’t require specialized weaving techniques.
Our Welding Cobot and the Beacon app give you the ability to use triangle and whip stitch (in-line) weave, covering almost all weaving in welding needs.
Triangle (Cross) Weld Weave
The triangle weld weave offers the best compromise of heat input, weld width, strength, and aesthetics. It’s an all-around, most suitable robotic weld weaving pattern for most applications.
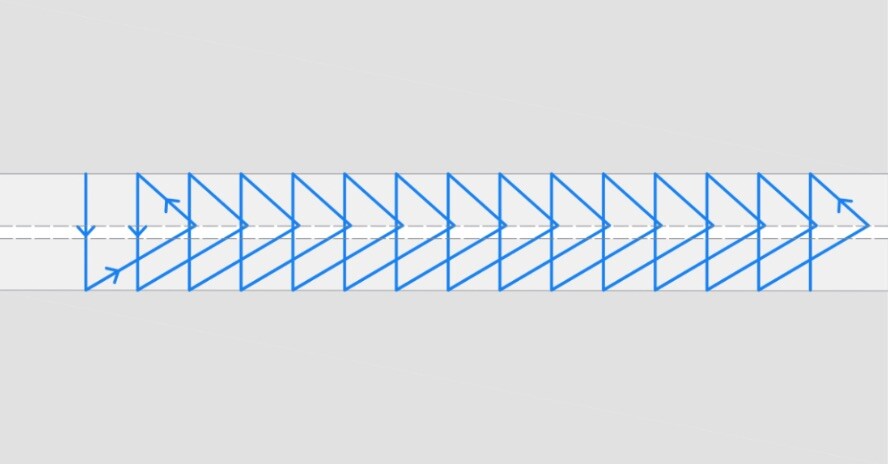
Robotic triangle weld weave produces the lowest weld and heat-affected zone (HAZ) hardness. And it offers favorable weld ductility and impact strength, absorbing a higher Charpy energy. You can read a good study on this if you are interested in specifics. But overall, triangle weave produces high-quality, ductile welds because it won’t overcook the material.

You’ll also get a nice, smooth weld bead appearance, and you can control the weld width to a large degree.
Whip Stitch (In-Line) Weld Weave
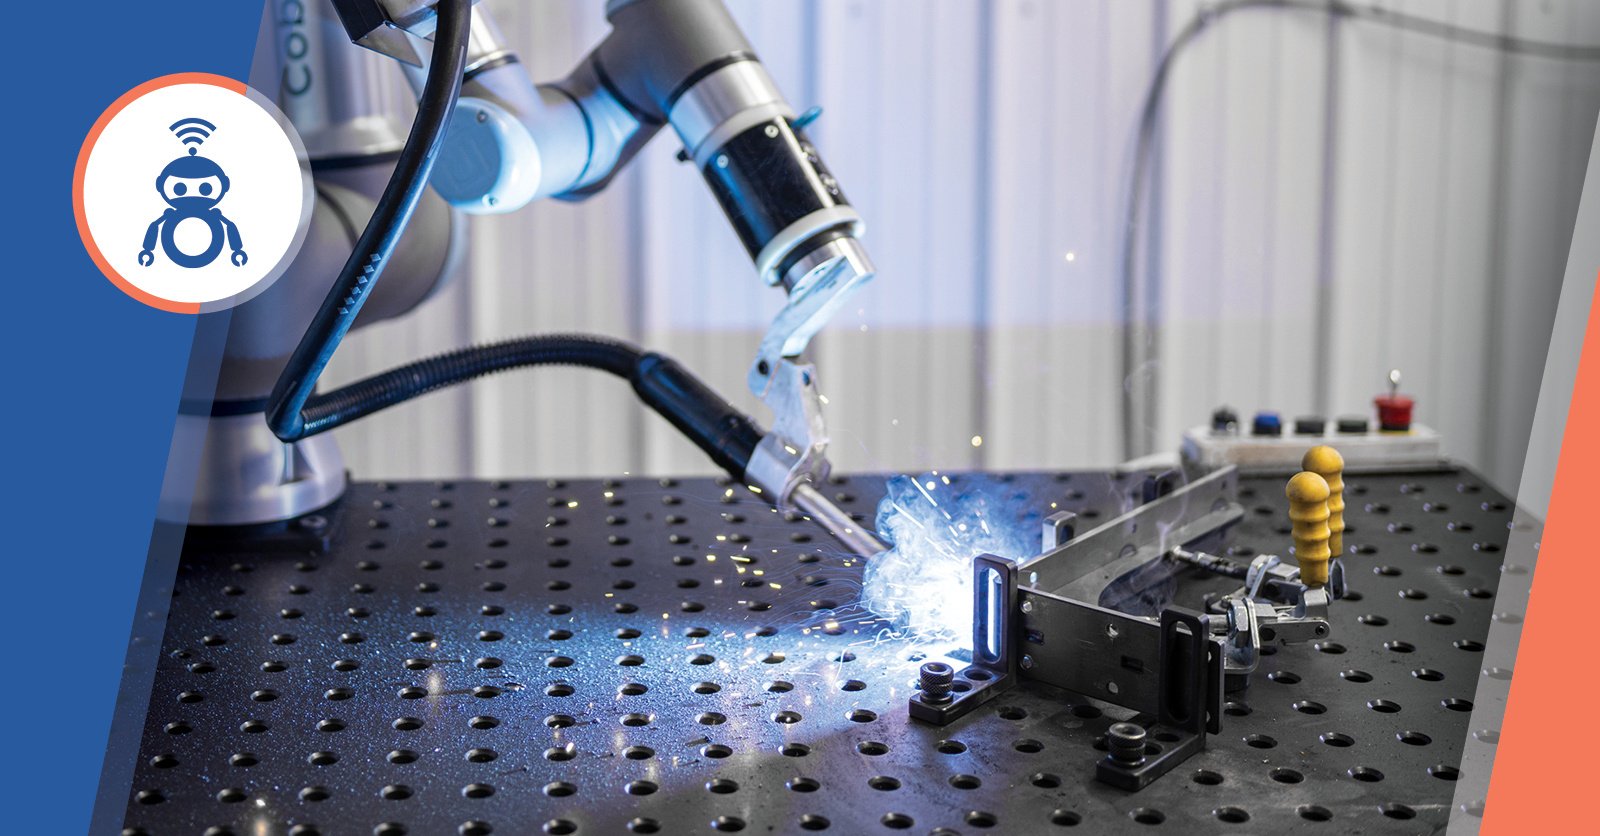
In-line, or whip stitch, robotic weld weave is the best torch oscillation method for achieving the TIG-like “stack-of-dimes” appearance. It provides the best aesthetics of all robotic weld weaving methods.


The robotic in-line weld weave function moves the torch back and forth in a linear progression. The welds solidify in intervals, stacking dimes in the process. This functions much like how a manual TIG welder dabs a filler rod into the puddle, progressing one dime at a time. In-line weld weaving can cause a wider HAZ. So, it’s primarily used for weld appearance.
Other Prominent Weld Weaving Patterns
Here are other common welding patterns that we see in welding. You can learn more about those weaving patterns in this article: Guide to Weaving in Welding: Weave Patterns and Pitch Calculation.
- Circular weld weave can input a lot of heat and cause deep penetration or provide a shallow penetration for surfacing welds. The circle radius determines the heat input and penetration. It typically inputs excessive heat. So, it’s not the most favorable welding pattern.
- Crescent weld weave is a multi-purpose welding pattern that allows good control over the concavity/convexity of the weld.
- Zig zag weld weave helps bridge wider gaps and fill wide bevels like double V joints.
How To Program Weld Weaving On a Robot
To use robotic weld weaving, you’ll need to modify the weld settings for your part. This can be really easy using our Cobot Welder and a Beacon smartphone app or more complex with other systems. However, with traditional robotics, this can require difficult programming.
Most cobots allow easier programming than traditional robots. But that doesn’t mean all cobot systems are easy to use.
Our Cobot Welder is controlled with a highly polished smartphone app, Beacon. No teach pendant and no back and forth with the power source. You control everything in a simple app without any robotic jargon or programming.

Follow these steps to set weld weaving for the entire weld path with Beacon:
- Create a new part in the app or select an existing one.
- Click the three dots in the upper right corner.
- Click weld settings.
- Toggle the weave function on.
- The triangle weave is auto-selected. Click on it to switch to in-line weaving.
- Adjust weaving frequency and path offset if needed.
- Click save.
- That’s it. You’ve set weld weaving in less than 30 seconds.
Alternatively, Beacon lets you set weld weaving only on a part of the weld path. For example, your weld path is 10-inch straight and then has a radial weld. To set up weld weaving only on the straight part of the weld, follow these steps:
- Open the part in Beacon.
- Select a point of the weld path you wish to modify. A small pop-up window will appear.
- Toggle the weave function on.
- Switch from triangle to in-line weaving if needed.
- Adjust weaving frequency and path offset, or use the default settings.
- Click save.
- That’s it. Your first part of the weld will weave, while the remaining will be a stringer weld.
You can set weld weaving on any weld path type in Beacon. Linear, radial, rotary… If it’s weavable, you can do it with Beacon.
Beacon will even let you set up weld weaving (or any other weld parameter) remotely. You can be in the other part of the world. The steps outlined above are the same.
Weaving Parameters
Beacon lets you adjust several parameters for the triangle and in-line weave. You can leave the default setting or input your own.
Triangle weave:
- Weave frequency (Hz) - Number of full waves per second.
- Path offset 1 (mm) - Peak amplitude of the upper half of the cycle.
- Path offset 2 (mm) - Peak amplitude of the lower half of the cycle.
- Dwell time 1 (seconds) - Time of movement suspension at the peak of the upper half of the wave.
- Dwell time 2 (seconds) - Time of movement suspension at the trough of the lower half of the wave.
Use path offsets 1 and 2 to manage the weave width and dwell times to control the heat input. For example, you might want to spend more time on a thicker member, so adjust the dwell time to be longer on it.
In-line weave:
- Weave frequency (Hz) - Number of cycles per second.
- Path offset 1 (mm) - Reverse push distance along the weld path. It is recommended to be set to 0mm.
- Path offset 2 (mm) - Forward push distance along weld path. Best results seen between 5mm and 7mm.
- Dwell time 1 (seconds) - Time of movement suspension at the peak of the side pattern along Path Offset 1.
- Dwell time 2 (seconds) - Time of movement suspension at the peak of the side pattern along Path Offset 2.
How To Calculate The Weave Pitch
The weave pitch determines the visual distance between the weld dimes on the surface of the bead. It can be an essential metric for aesthetic purposes and meeting client criteria. For example, producing parts for the food and beverage industry can require meeting specific weld aesthetics. Thankfully, you can predictably apply a relatively consistent weave pitch with the right cobot welder.

The table below shows the relationship between the frequency of pulses and the visual pitch between weld dimes at a particular robot travel speed.

Example: If the frequency is set at 10Hz and the robot travel speed is set at 30 inches/min, the distance between dimes of the weld would be 0.05''.
Want to See How Beacon Can Automate Your Welds?
Regardless if you already use welding robots or are considering them, Beacon will change the way you perceive robot programming.
We have the most intuitive and exceptionally easy-to-use welding robot software on the market. Beacon is designed for welders, not programmers or robot technicians. It speaks shop lingo and just works from the moment you open the app.
See our essential guide on programming a robotic welder, and then book a free demo with our team. We’ll show you how our Cobot Welder can automate your welding and just how simple Beacon is.
