by Matt Bush, on Aug 28, 2019 1:54:00 PM
I was recently asked about how could you implement free-drive in a program while also restricting the motion to be planar in the X-Y plane of the robot. That made me stop and consider how would I accomplish this within a program. One of the first thoughts that came to mind was use the built-in force mode that UR provides under the Wizard menu and allow the X and Y axes to be compliant while restricting all other axes. This is definitely one solution, but I have had some issues in the past with the robot trying to move when I didn’t want it to move. So then I poked around in the URScript manual some and came across the speedl command. With this command you are able to give a velocity vector that will tell the robot how to move with both translational and rotational speeds. This looked promising, so I went down this path to learn more about the function.
Starting the Code
I knew that I wanted to use the force feedback from the robot to control how the arm was moving so that as the user pushed or pulled on the arm the robot would respond by moving away from the force. The first thing I did was create a thread that would pull in the forces from the built-in FT sensor on the Universal Robots UR10e that we used in the demo. I was then getting the X and Y forces from the thread and using them in the main body of the program in if statements. Then I just used a fixed velocity for each of the 4 directions the robot would need to move. This gave me the ability to move the robot away from my hand but only in 1 direction at a time. This is not what we are looking to do.
Advancing the Code
The next thing that we did was to make the thread a little more intelligent by adding a vector calculation and then using that vector to determine how fast to move in the two directions we want to use. The X&Y forces are used to get a force vector using the norm() function that UR provides. When you pass in a list of values you will get back the combined vector of those two values.. Then I use this vector to calculate the portion of the x and y components and multiply that by the speed constant I want to achieve.
Once I had the forces being calculated and the speeds I wanted to use I changed the top portion of the program to basically say anytime the force acting on the arm is over a certain limit, execute a speedl command with the x and y speed that was calculated in the thread below. After getting the basics of this working it was time to convert in into script and begin to fine tune the motion so that I had smooth motion both with large movements of the arm as well as small movements. Here is the script code that I came up with.
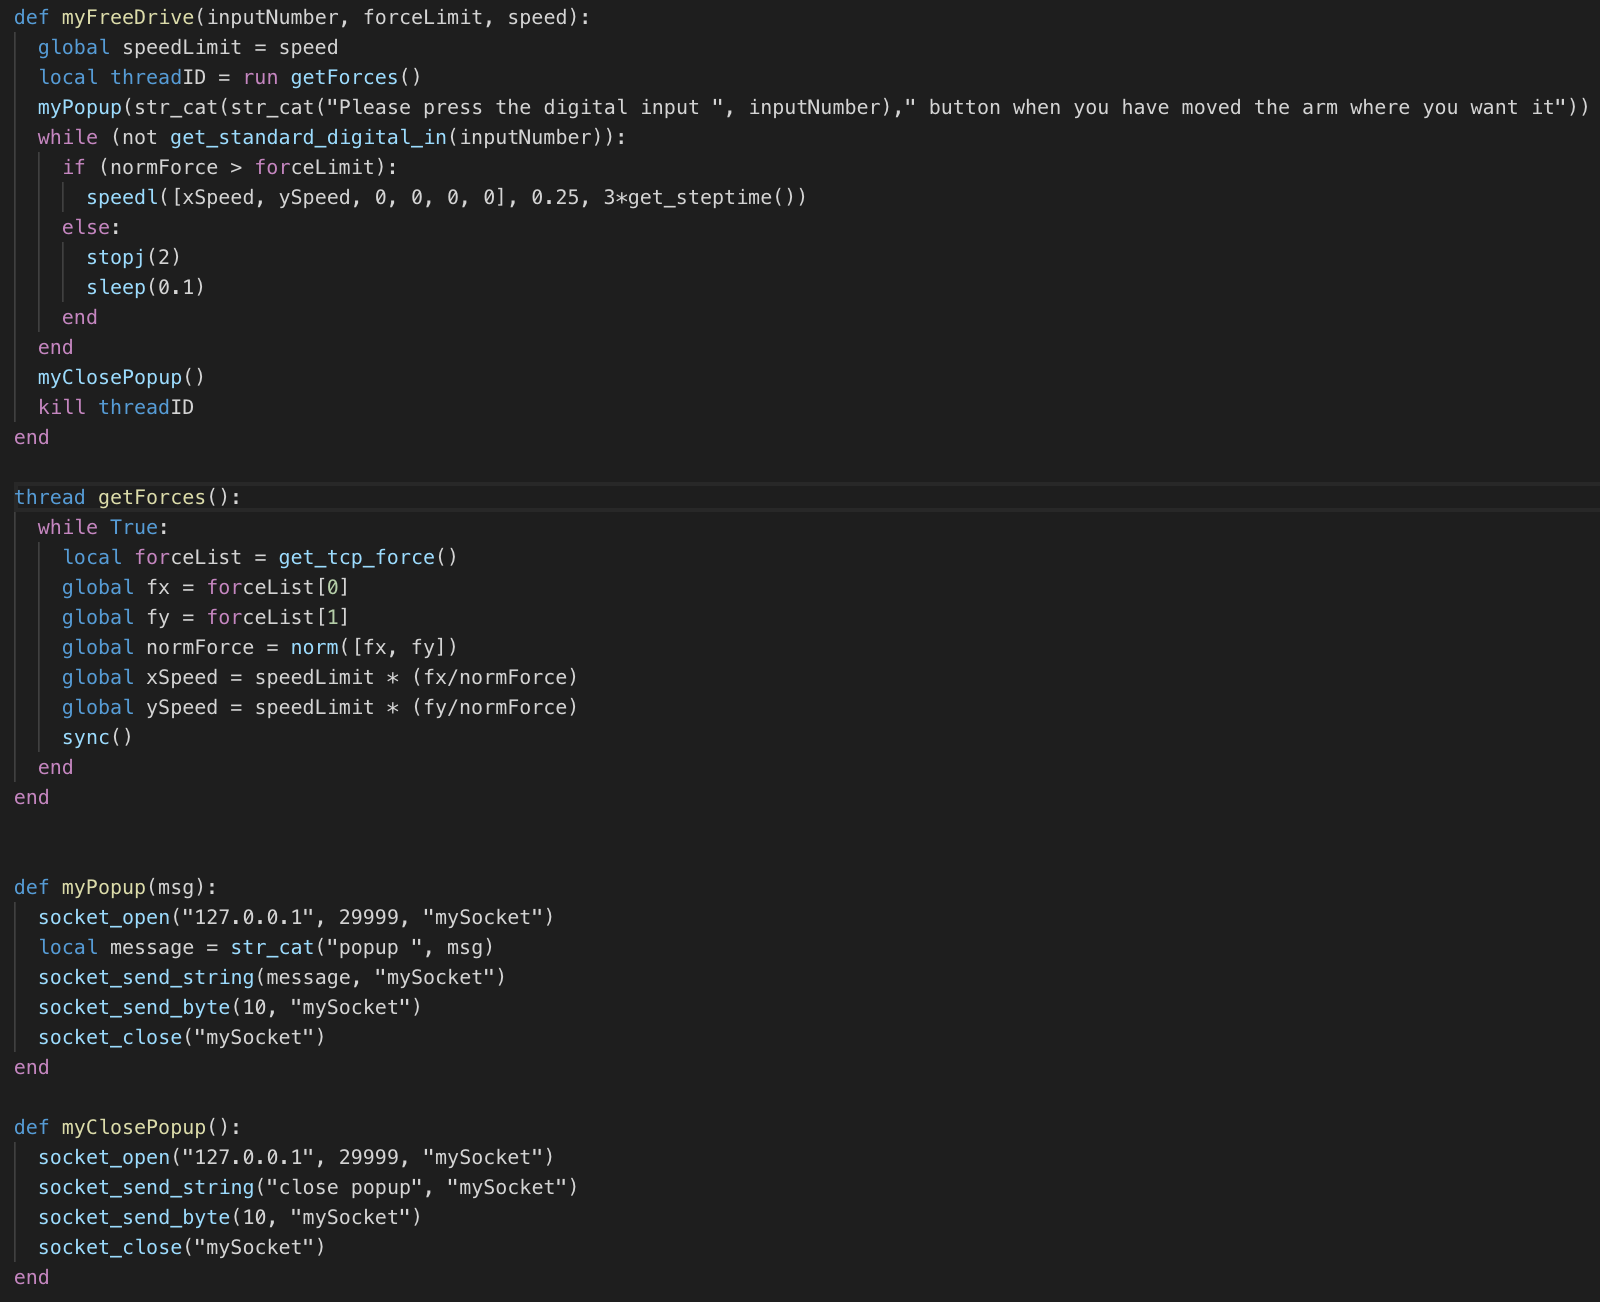

You can see there are also a couple of added functions in here, the first one myPopup creates a non-blocking popup message that also only has 1 button on it called ‘OK’. I prefer this over the builtin popup function as there is not a ‘Continue’ button and a ‘Stop Program’ button on it. When all I want to do is convey information I do not want to give the operator a chance to stop the program with it, even accidentally. I also included a function for closing the popup automatically once the user has done the action, called myClosePopup. In the case of the example below the popup was closed when a button attached to Digital Input DI0 (0 in the example) was pressed.
So there are a few things I want to point out in the speedl command, the first is that I played around with the acceleration that we used and settled on 0.25 m/s as that seemed to give the nicest motion. I also used the new function for returning the time that the controller uses per step (0.008 for CB3 and 0.002 for E-Series). When it was at 0.002 it seemed a bit jerky so I just played around until I thought it was smoother, 3X seemed to be about right for me. Side note, the great thing about this function that UR provided is you can write time dependent functions now and use them on either robot without changing any of the code.
Example Code Using the Function
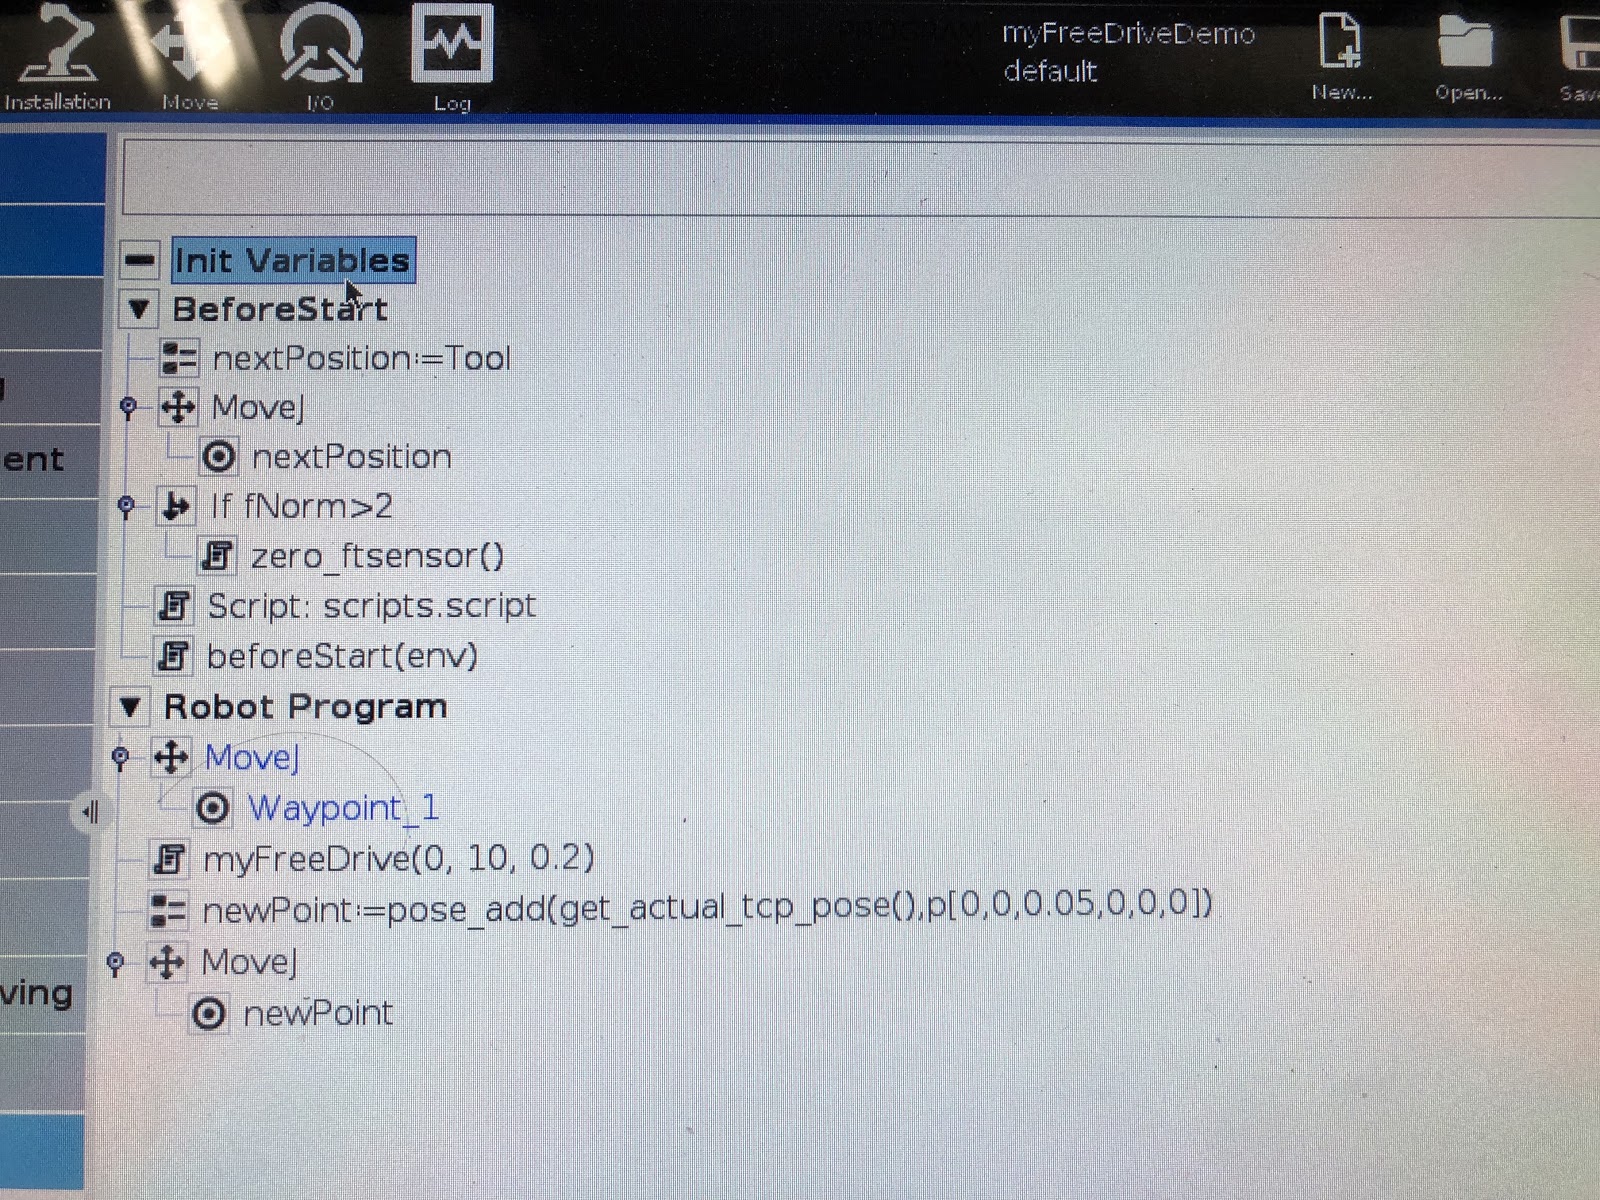
Here is a screenshot of the program that I write to use this new function. Basically the robot moves to a fixed waypoint and then enters the function. The robot then exits the function when the operator presses the button attached to DI0. Once it exits, a new waypoint is calculated based on the current new position and then the robot moves to that new waypoint before moving back to the original point and starting all over again.

And here is a video of the robot running the program.
Wrap Up
This was a lot of fun for me to learn as I had never tried using the speedl command before. I did some further playing around and for instance, had two conditions in the thread, one where the robot was allowed to move in 3 axes, X-Y-Z until a button was pressed and then no matter what Z the robot was at it locked to the X-Y plane at that Z location until the button was released. There is still some additional work that would be needed on this to reliably use it in production as this is more of a proof of concept and quick mental exercise. If you decide to work on this and get it working better, please post in the comments down below so that everyone can continue to use this to learn and expand our understanding of how the Universal Robots programming language works.
I hope that this guide helps you to understand more about the speedl command. Stay tuned for more information and let me know if there is a topic that you would like to have covered.